


By default, the Platform Starter Kit comes with the ability to sign in with GitHub. Although this is a great option to get started, it is not useful for communities outside of the developer universe - such as the Legal Community. For the legal community, signing in with LinkedIn will provide greater coverage - and in this blog post we will walk through getting everything working. Most of these instructions are based on this post from Vercel https://next-auth.js.org/providers/linkedin
Create Your LinkedIn App
You can create a LinkedIn App for no cost at https://www.linkedin.com/developers/apps/new

If you do not already have a LinkedIn Page for your website, you may need to create one at https://www.linkedin.com/company/setup/new/
Although you should have a privacy policy, it is not necessary to get started.
You do need a logo for the Authorization page. If you do not already have one, you can try https://ideogram.ai/ - it is a generative AI image creator from some former engineers at Google. It created this logo for Attorney Mesh

Configure Your LinkedIn App
Now that you have your LinkedIn App, you first need to request access to "Sign In with LinkedIn" on the "Products" tab of your app - click the Request access button.

Approval is pretty much instant.
Now flip over to your Auth tab on your LinkedIn app.
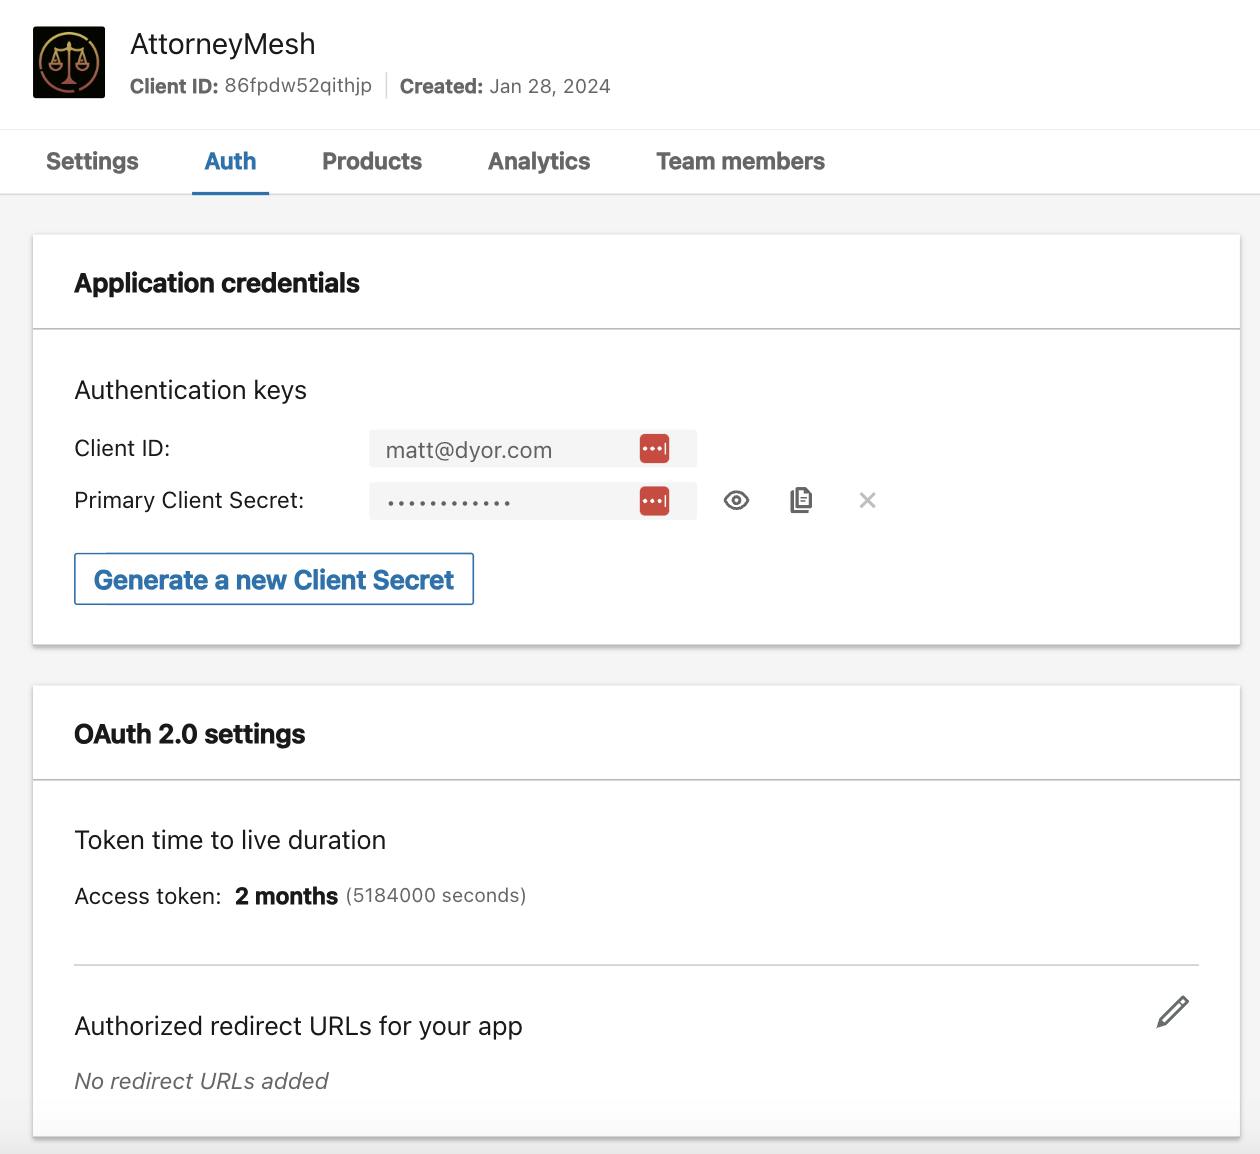
Get Client Id and Client Secret
For your client id, if you use LastPass it will bork it - look for your actual client id underneath your app name.
Click the Eye to get your Client Secret
Paste these into your
.envfile asLINKEDIN_CLIENT_IDandLINKEDIN_CLIENT_SECRET.
http://app.localhost:3000/api/auth/callback/linkedin
Head into your /lib/auth.ts file
import LinkedInProvider from "next-auth/providers/linkedin";
...
# within the providers section...
    LinkedInProvider({
      clientId: process.env.LINKEDIN_CLIENT_ID as string,
      clientSecret: process.env.LINKEDIN_CLIENT_SECRET as string,
      authorization: { params: { scope: 'profile email openid' } },
      async profile(profile) {
          return {
              id: profile.sub,
              name: profile.name,
              email: profile.email,
              image: profile.picture,
          }
      },
    })
...
/Users/mattdyor/Documents/febak/febak/
Add another button to that login button page (app/app/(auth)/login/login-button.tsx) - Copy and Paste the Github button, being sure to replace signIn("github"); with signIn("linkedin"); . You will also need to wrap the buttons with <> and </>.
Push to Production
When you push to production, remember to add your LINKEDIN_CLIENT_ID and LINKEDIN_CLIENT_SECRET variables to your environment.
AND, as always, you need to push a change for the environment variables to catch - so if you add the variables after you have updated your code you need to redeploy.
Errors
I kept getting an error of "The redirect_uri does not match the registered value" localhost.
Push to production, I get a different error: "error_description: 'Scope "r_emailaddress" is not authorized for your application', providerId: 'linkedin', message: 'unauthorized_scope_error'" (in the logs).
https://github.com/nextauthjs/next-auth/issues/8831 - solution'ish - this ended up solving it for me.
LinkedInProvider({
      clientId: process.env.LINKEDIN_CLIENT_ID as string,
      clientSecret: process.env.LINKEDIN_CLIENT_SECRET as string,
      authorization: { params: { scope: 'profile email openid' } },
      // issuer: 'https://www.linkedin.com',
      // jwks_endpoint: "https://www.linkedin.com/oauth/openid/jwks",
      async profile(profile) {
          return {
              id: profile.sub,
              name: profile.name,
              email: profile.email,
              image: profile.picture,
          }
      },
    })